New clients, or even those that you’ve been working with for some time, can all benefit from focusing some of their training on stabilization work. Without a strong structural base to move from, how can we continue to build upon our foundation or safely excel in our fitness endeavors? Not very well!
Stabilization training helps us to establish this base, while also laying the groundwork to achieving multiple fitness goals and higher training levels. NASM’s Optimum Performance Training™ (OPT™) model is a three level system of five phases that starts with stabilization endurance training. No matter a client’s ability, this initial phase can be manipulated to challenge even the most seasoned athlete or regressed to accommodate a novice exerciser.
What is Stabilization Endurance?
Stabilization endurance training uses high repetitions and proprioceptively enriched activities—activities that challenge an exerciser’s balance. These proprioceptive type activities are progressively introduced from stable to unstable.
For example, as a client masters a push-up on the ground he or she will then move to performing the push-up on a stability ball, a BOSU®, a Core-Tex™, a suspension trainer, or a whole-body vibration (WBV) platform. This increases the neuromuscular recruitment required to stabilize the joints through the upper body and maintain optimal posture.
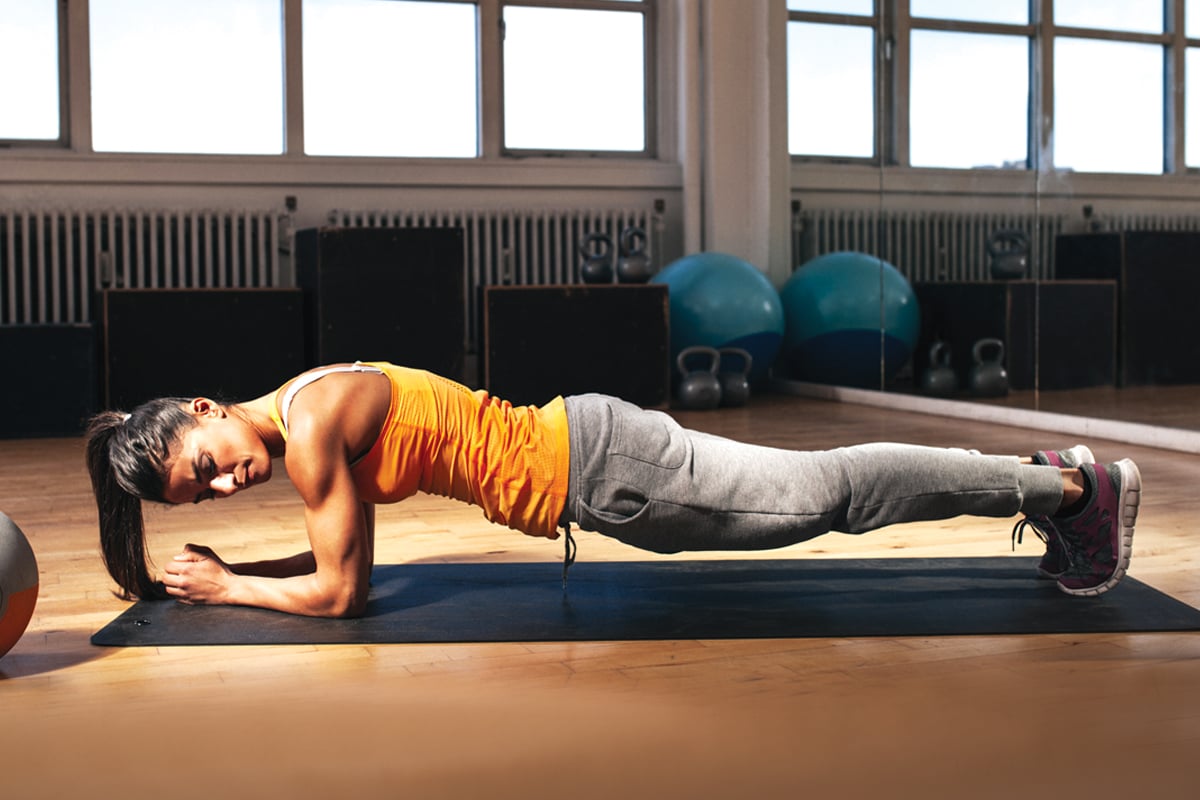
Phase 1 can also be applied to core and balance activities in addition to resistance training. Core exercises in this phase of training involve little motion through the spine and pelvis (i.e., floor bridge, plank) while balance movements involve minimal joint motion and focus on reflexive joint stabilization (i.e., single-leg balance, single-leg lift and chop). Even plyometric activities can be adapted to Phase 1 by adding a static hold to landings (i.e., squat jump with a 3-second hold on the landing).
Weight loss is one of the top reasons people join a fitness club. And using the 1st phase, you can design great programs for weight loss.
Fitness professionals can help members achieve this goal with Phase 1 stabilization endurance training as well. The additional muscles recruited to stabilize the body, the higher repetitions, the minimal rest between sets, or the use of a circuit format can enhance the calorie burning of a session.
During Phase 1, rest time between sets ranges from no rest at all to 90 seconds. Repetitions range between 12 to 20 per set, with 1 to 3 sets of each exercise. The amount of weight being moved during Phase 1 is less intense—approximately 50 to 70% of a client’s one repetition maximum (1RM) or even just body weight alone. If you aren't sure about your clients' maxes, you can calculate their one rep maxes here.
Tempo of movement during Phase 1 is set at a slower 4/2/1 pace. This means that it is 4 seconds for the eccentric contraction, 2 seconds for the isometric hold, and 1 second for the concentric contraction. By utilizing slower eccentric and isometric actions, more demand is focused on the connective tissue and stabilizing muscles, preparing the nervous system for future functional movements.
OPT™ Model Phase 1 Workout Sample
Here is an NASM OPT™ Phase 1 sample workout. It includes a short warm-up that utilizes foam rolling moves. Each of the listed exercises also offer progressions and regressions to help meet the needs of your clients.
The majority of the exercises are flexion/extension-type moves performed in the sagittal plane, moves most people will probably be more comfortable with when initially starting an exercise program. But don’t worry, this program can be a challenge even for your more advanced clients. Give it a try; it may look easy on paper, but it will definitely bring a challenge, especially if you make it a three round circuit with minimal rest between sets and only a one- to two-minute rest between rounds!
Remember, fitness professionals need to complete a health history and fitness assessment on their clients prior to designing an exercise program. This is to identify what specific movement restrictions they may have and therefore, select the appropriate flexibility and strengthening exercises based on the results, their goals, and if medical clearance to exercise is needed. Modify where appropriate for your clients and their specific needs.
OPTIMUM PERFORMANCE TRAINING™ (OPT™) MODEL
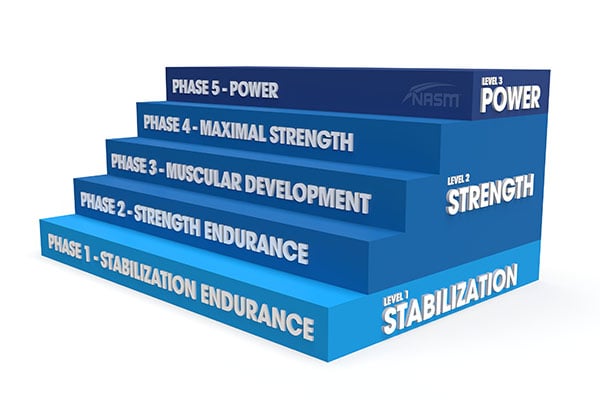
OPT Level 1: Stabilization Endurance
Reps: 12 to 20
(Single-leg workouts or arm variations: 10 reps each side)
Sets: 1 to 3
Tempo: 4/2/1
Intensity: 50 to 70% of 1RM
Rest: 0 to 90 seconds
Circuit option: After warm-up, complete 1 set of all exercises with minimal rest between moves. Perform first pass, rest 1 to 3 minutes and repeat circuit 1 to 2 more times, then cool down.
WARM-UP
Foam Roll
Hold on tender spot for 30 seconds: Calves, adductors, hip flexors and upper back
Static Stretch
Hold a static stretch of each area for 30 seconds: Calves, hip flexors, adductors and latissimus dorsi
*Include foam rolling and stretches for areas identified as tight/overactive during the client assessment.
EXERCISES
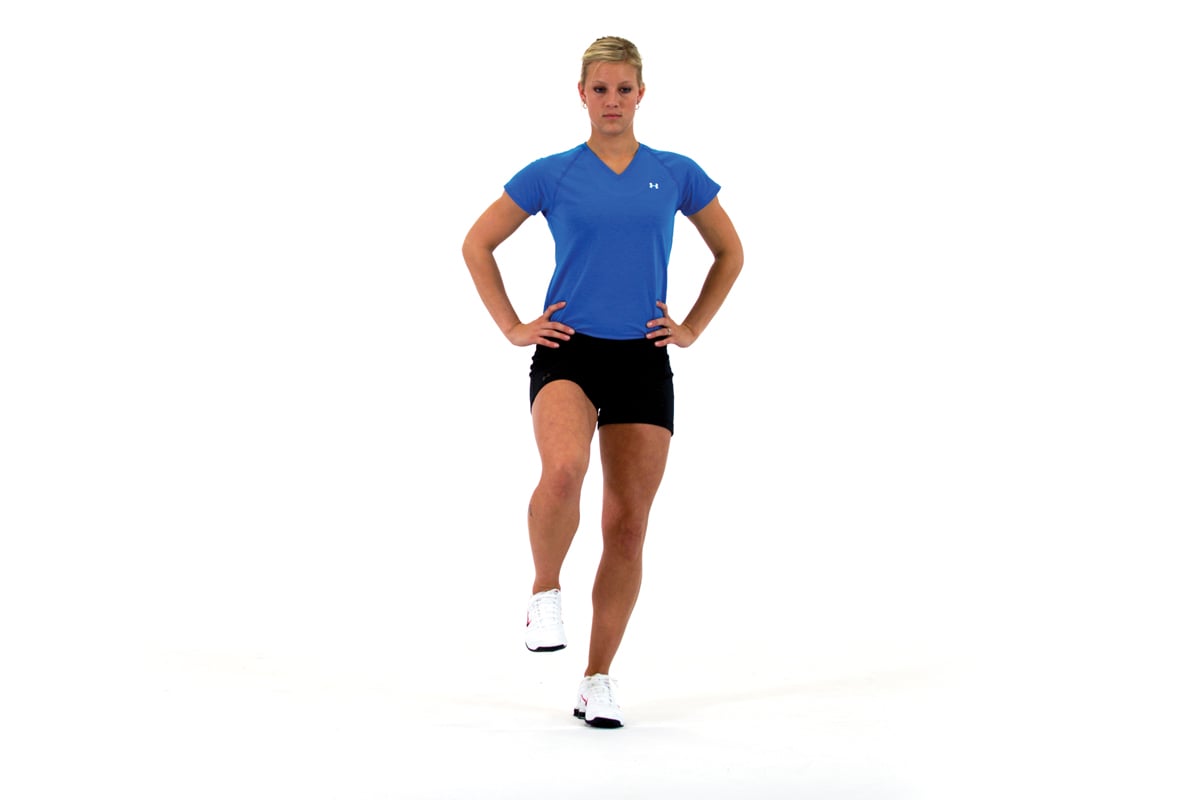
Single-Leg Balance
Stand with feet shoulder-width apart, toes pointed straight ahead and hips in neutral position. Lift one leg directly beside balance leg and dorsiflex toe. Flex hip and knee to bring thigh parallel to ground. Hold for 5 to 10 seconds. Repeat. Switch legs.
Regress: Perform while holding on to a stable surface.
Progress: Perform on foam pad.
You can see an exercise demonstration of the single-leg balance here.
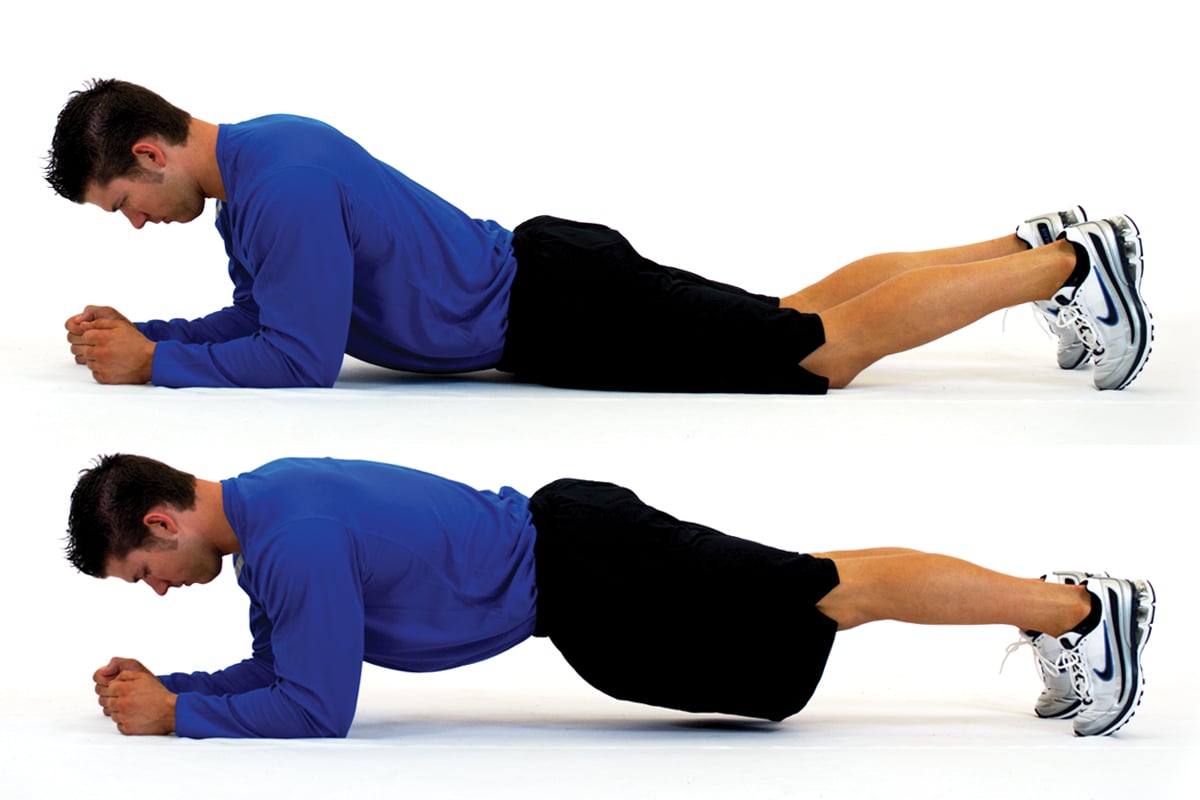
Plank
Lie face down on the floor with feet together and forearms on the ground. Keeping abs in and glutes tight, lift entire body off the ground until it forms a straight line from head to heels. Hold for 1 to 2 seconds, return to start, repeat.
Regress: Perform on knees or with hands on a bench.
Progress: Alternate lifting one leg off the ground each rep.
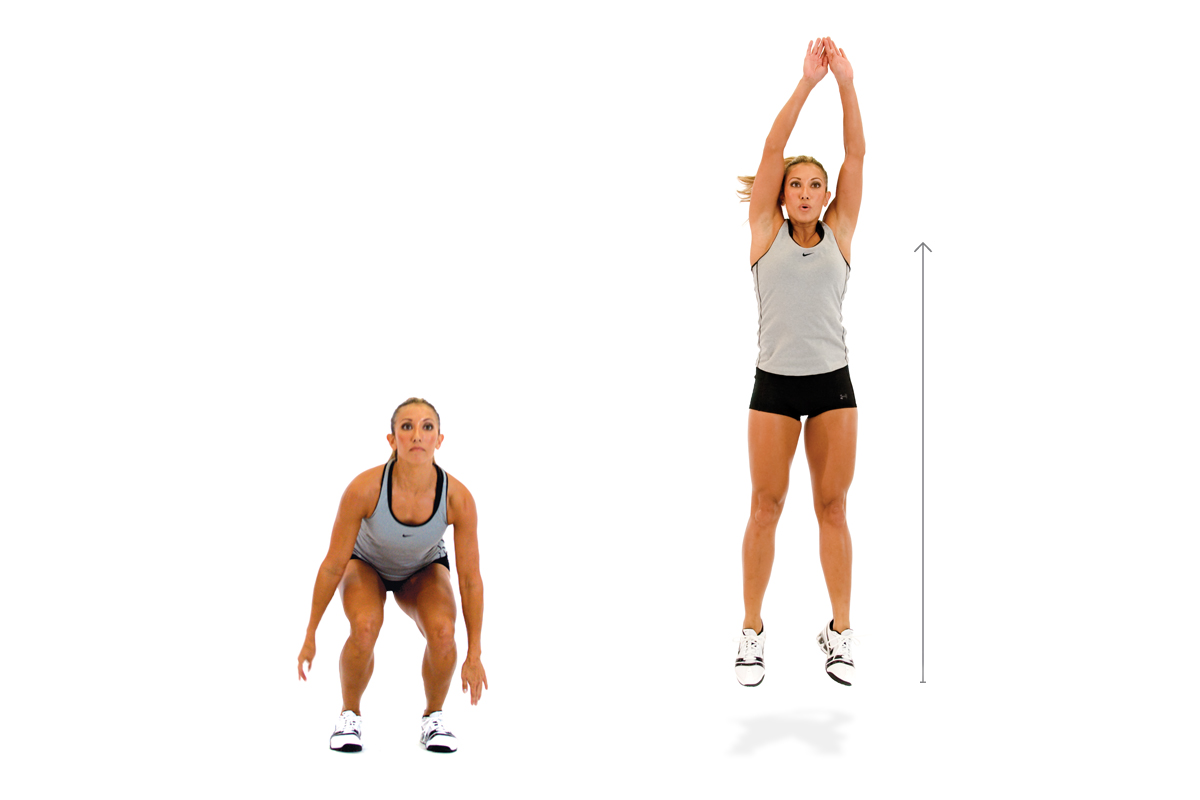
Squat Jump With Stabilization
Stand with feet shoulder-width apart, toes pointed straight ahead, hips in neutral position and knees aligned over second and third toes. Squat slightly as if sitting in a chair. Jump up, extending arms overhead. Land softly and hold for 3 to 5 seconds. Repeat.
Regress: Decrease the depth and do only a shallow squat.
Progress: Pull knees up higher into a tuck jump.
Watch a squat jump breakdown here
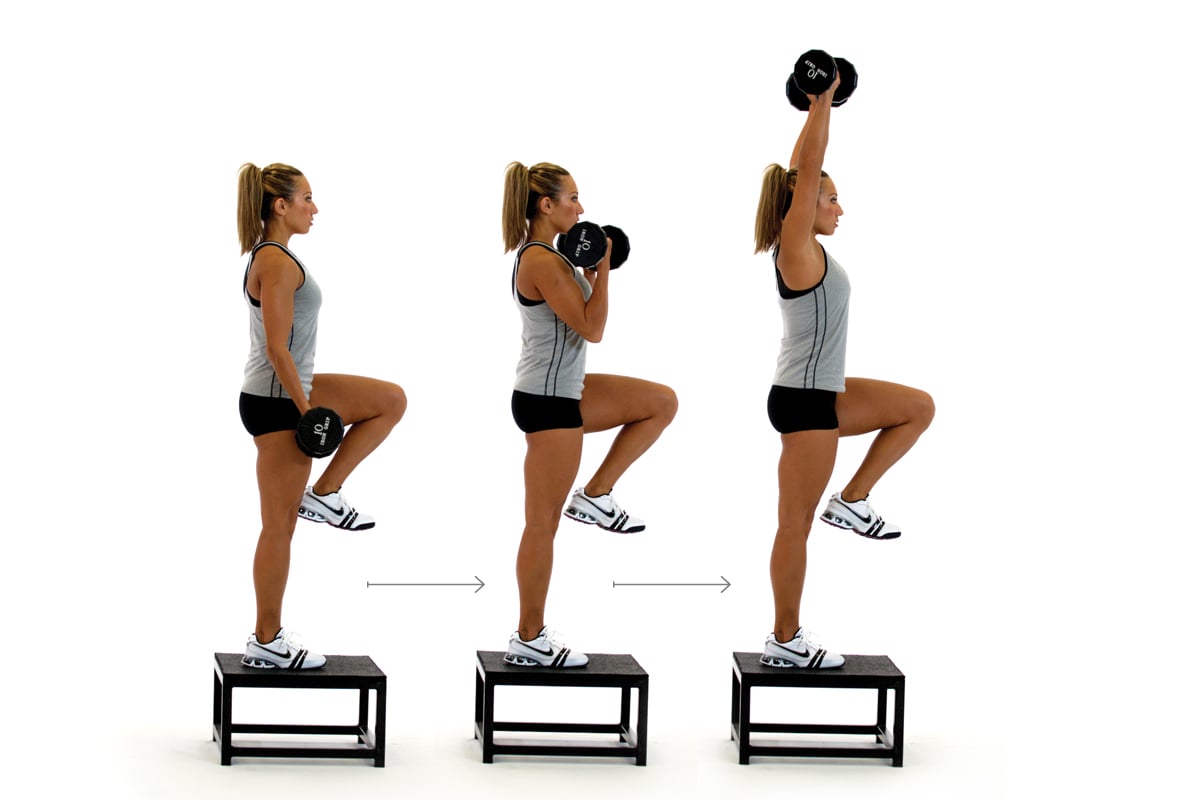
Step-up to Balance, Curl and Overhead Press
Stand in front of a step or plyo box (6 to 18 inches high) with dumbbells in hand. Step up with one leg, keeping foot pointed straight ahead and knee lined up over mid-foot. Push through the heel and stand up straight, balancing on one leg. Flex the other leg at the hip and knee. Once balanced, curl, then press dumbbells overhead. Lower dumbbells, return lifted leg to the ground, step off box to starting position. Switch legs. Repeat.
Regress: Omit the balance hold.
Progress: Perform in the frontal or transverse plane.
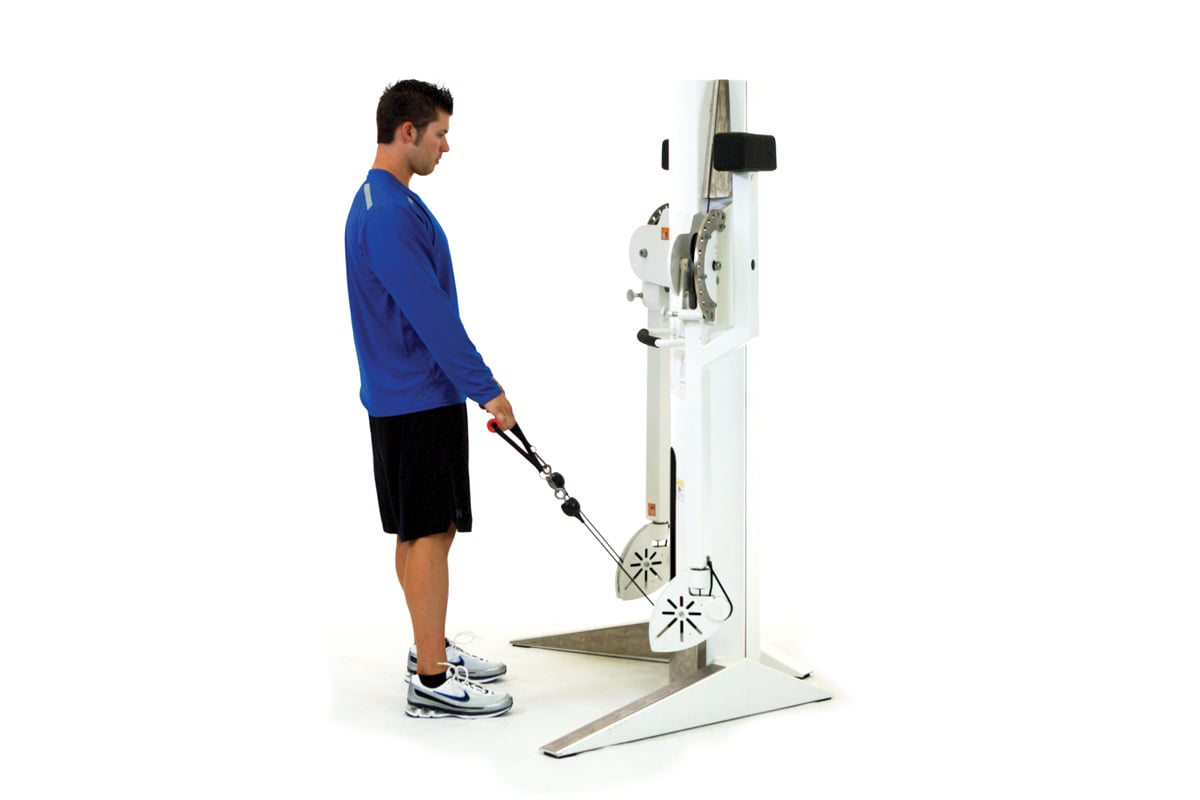
Cable Squat
Stand with feet shoulder-width apart, toes pointed straight ahead, hips in neutral position, knees aligned over second and third toes. Hold cables to the side of the body and slowly begin to squat, not allowing any internal rotation at the hips or knees. Sit back while maintaining a neutral spine and chest up. Stand back up by contracting the glutes and pressing through the heels as knees extend. Repeat.
Regress: Ball squat against a wall or decrease depth of motion.
Progress: Squat without cables.
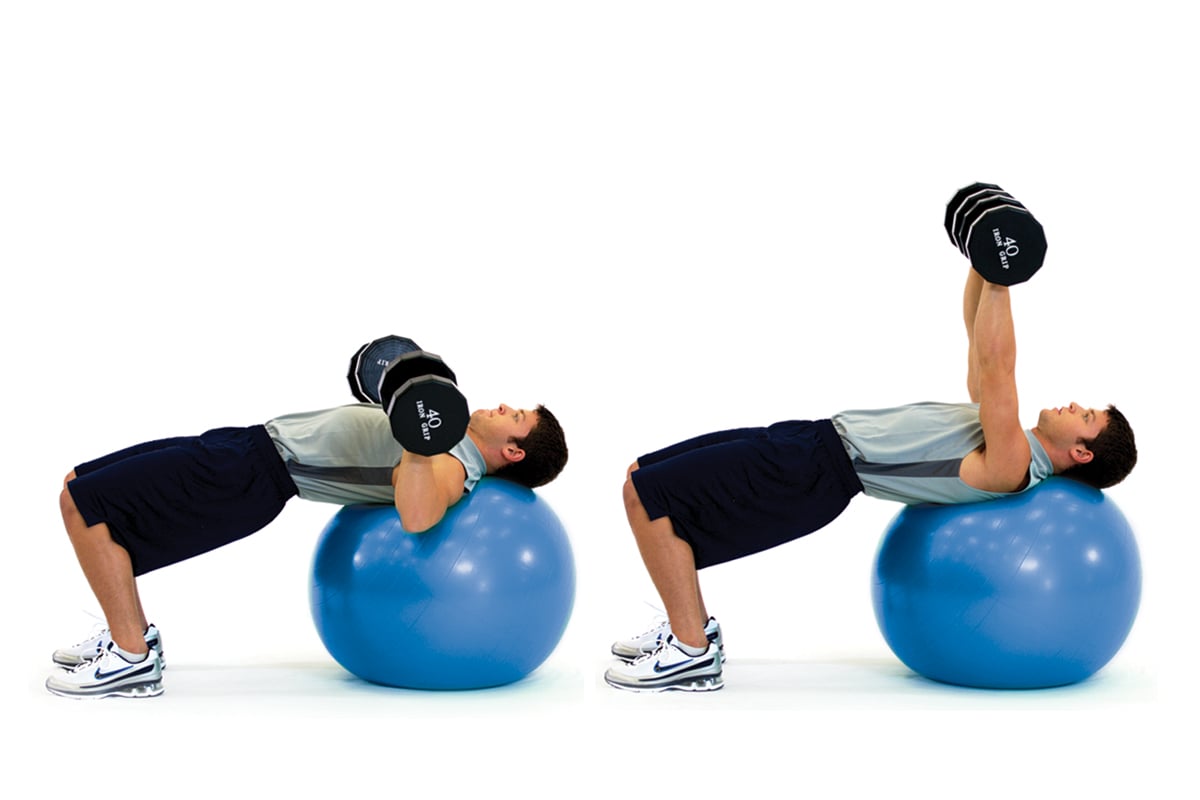
Dumbbell Chest Press
Lie on your back with a stability ball between shoulder blades, feet shoulder-width apart and pointed straight ahead, knees bent, glutes contracted and hips lifted. Start with a dumbbell in each hand at chest level, press both dumbbells straight up and then together by extending elbows and contracting chest. Slowly return to start position and repeat.
Regress: Perform on a flat bench.
Progress: Alternate arms.
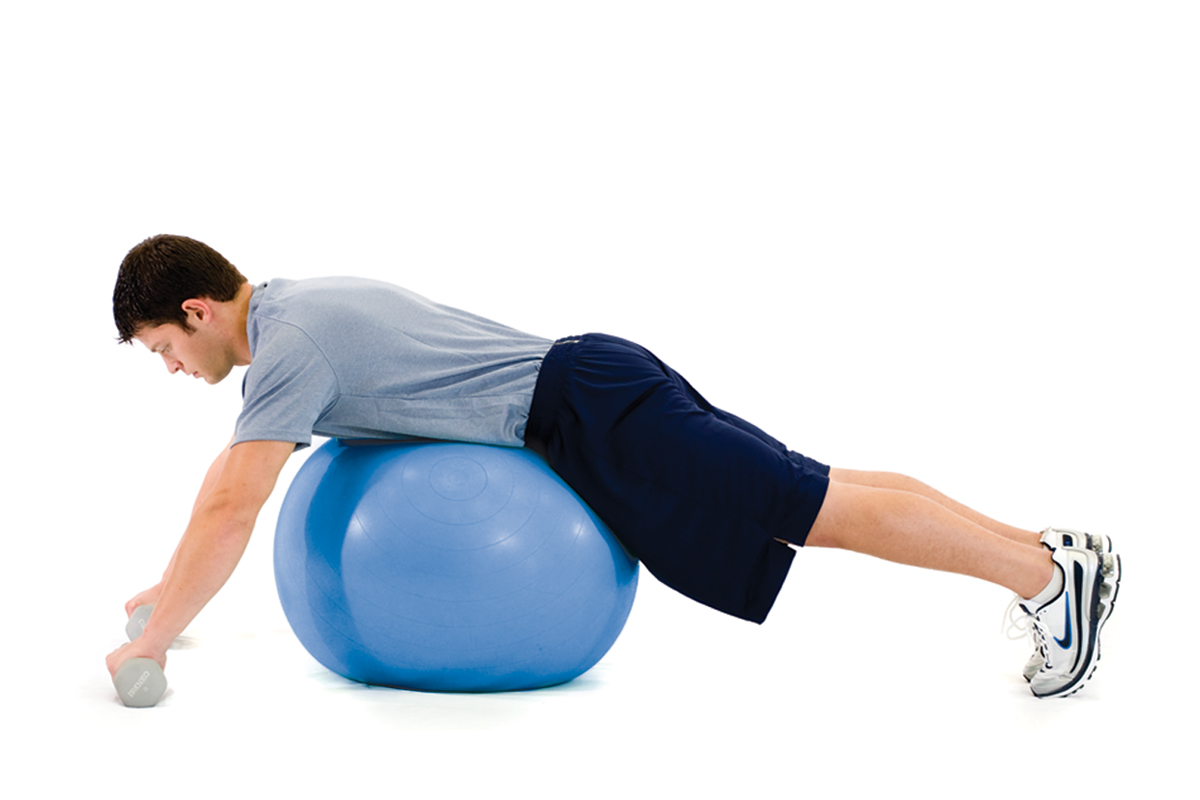
Dumbbell Row on Ball
Start in a prone position with abdomen over a stability ball, feet pointed down, legs straight and abs drawn in. Hold dumbbells in each hand and extend arms in front of body. Lift chest off the ball and row the dumbbells bringing thumbs toward the armpits. Repeat.
Regress: Kneel over the ball.
Progress: Alternate arms.
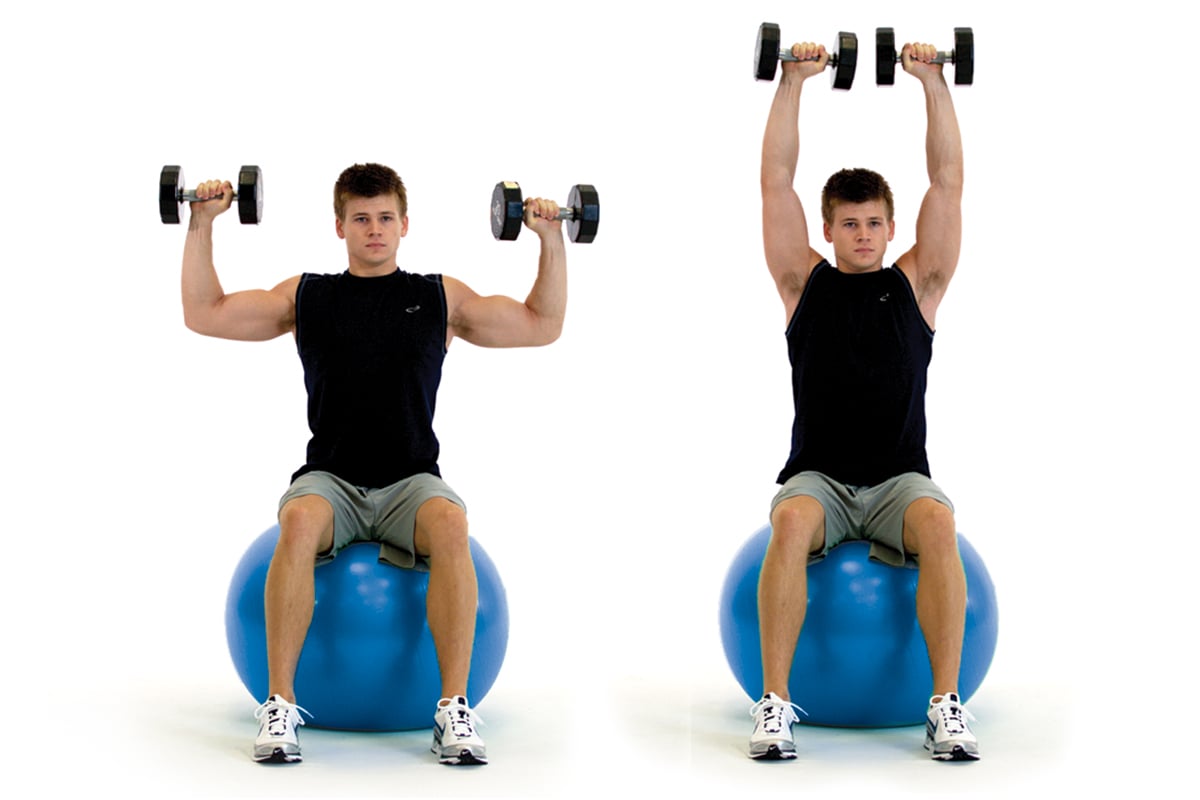
Overhead Military Press on Ball
Sit on a stability ball with feet planted hip-width apart and pointing forward. Starting with dumbbells at shoulder level, press them overhead until both arms are fully extended, palms facing forward. Slowly return dumbbells to starting position. Repeat.
Regress: Seated on a bench.
Progress: Alternate arms.
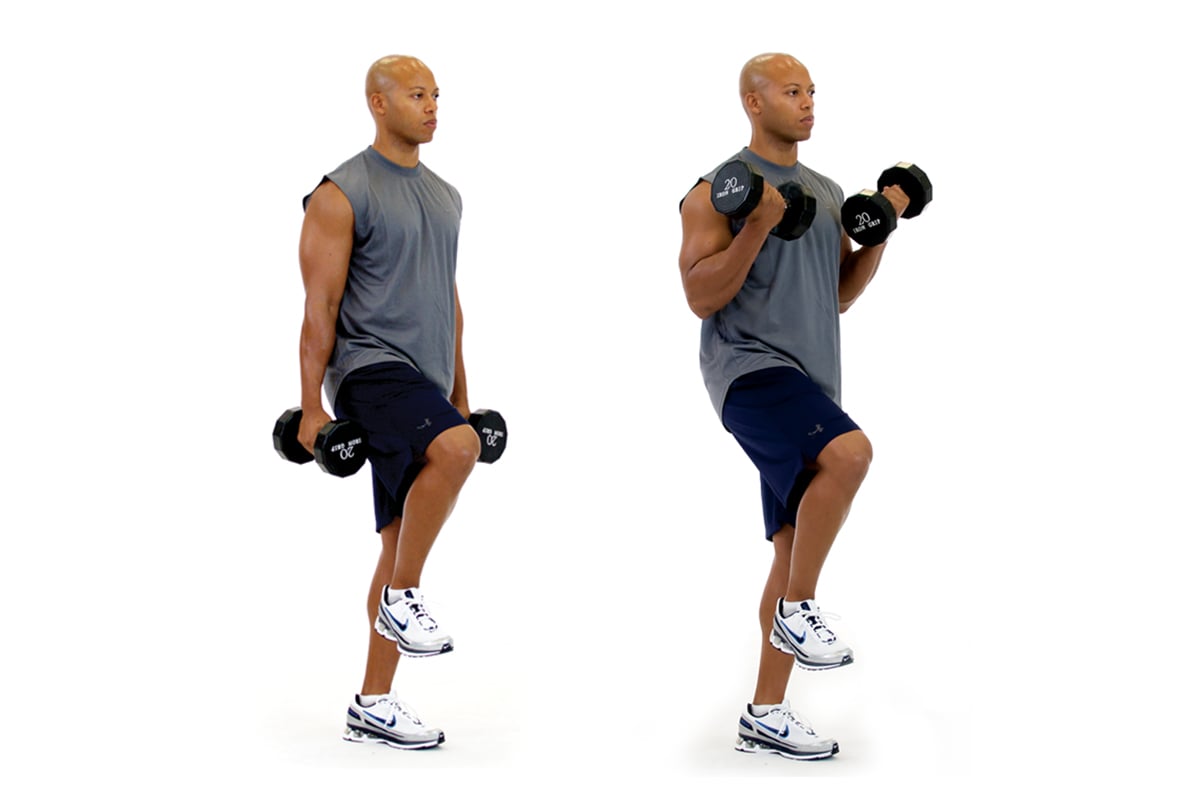
Single-Leg Biceps Curl
Stand on one foot, toes pointed straight ahead, knee slightly bent over second and third toes. Start with arms by the sides, dumbbell in each hand. Perform a biceps curl by flexing the elbow. Slowly return to start position, repeat for 10 reps and then switch legs.
Regress: Stand on both legs.
Progress: Alternate arms or stand on an unstable base.
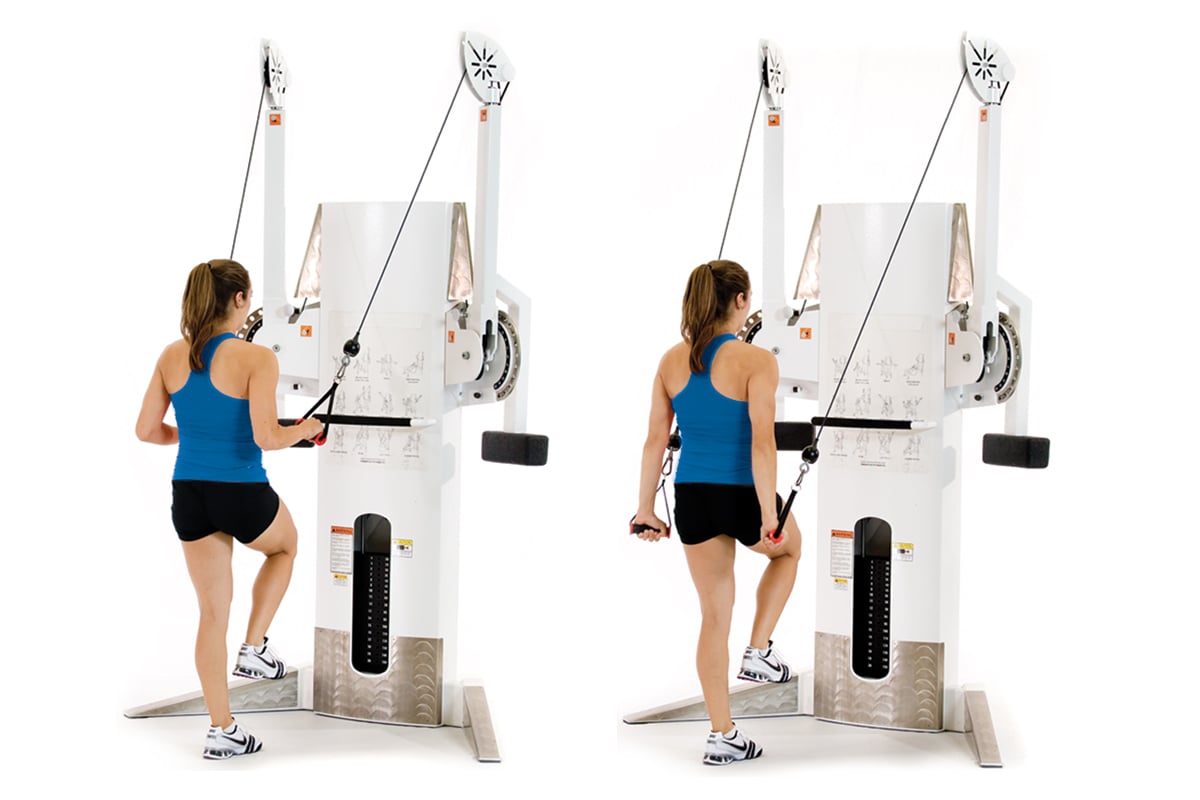
Single-Leg Triceps Extension
Grasping cable machine handles with palms facing the ground and elbows bent at a 90° angle, stand on one foot, toes pointed straight ahead and knee slightly bent over second and third toes. Keeping shoulders back and down, extend the elbows by pushing down on the handles until arms are fully extended. Return to start and repeat.
Regress: Stand on both legs.
Progress: Alternate arms.
Cool-Down
Repeat warm-up activities
Should You Be Sore?
Clients, especially those new to exercising, may ask you about muscle soreness in the days following their training and when it will subside. Other clients may judge the value of their workout on their soreness level. As the body responds to and adapts to new physical stressors (i.e., exercise, increased overload), delayed-onset muscle soreness (DOMS) may occur. DOMS is often felt 24 to 72 hours after the exercise session.
Minimize DOMS by starting clients at appropriate, yet low levels of intensity, gradually progressing their training overload as their body becomes more efficient and adapts to the stressors. For clients needing more overload in their training program, adjust acute variables such as reps, sets, tempo, rest, intensity, and the exercises selected to increase the challenge.
For additional workout ideas, be sure to check out these resources
- 30 Minute Workout Programs for Busy Clients
- 3 Workouts from Anywhere
- Blood Flow Restriction Training
- Core Training for Seniors
And watch this NASM Roundtable Video on Balance Training for some food for thought.


