


Originally appeared in the spring 2019 issue of the American Fitness Magazine.
 I was sweating profusely before I trained my first client, and it wasn’t from a workout. I was a nervous wreck, continually second-guessing what I was supposed to do. Would I be worth the money? Would I be able to train the client the “right” way? These questions led me to write this article to help new personal trainers better understand what to do during their first training session with a client—in this case, a brand-new exerciser.
Fortunately, the NASM Optimum Performance Training™ model was designed so CPTs wouldn’t have to struggle with these questions. Most clients, especially those new to training, will start in Phase 1: Stabilization Endurance. As you plan for a client’s first “real” session, review the details that follow so you’ll be sure to start off on the right foot.
Use Assessments to Guide Exercise Choices
Let’s set the scene: You are getting ready for a training session with a new client—a novice exerciser committed to getting in shape. Let’s call her Jane. You’ve already met Jane for a complimentary session, where you went over goals, the PAR-Q and a series of assessments.
Today’s visit means you made her feel comfortable enough to purchase a package of training sessions. That’s a good start; however, what comes next is vital to maintaining and building on this early rapport. You want to provide Jane with the results and experience she expects (and has paid for).
Start by reviewing your notes from the initial assessments and highlight the exercises that your new client enjoys the most (or hates the least!). Select one as her anchoring exercise—a movement she is already comfortable with that you can circle back to at intervals. You’ll use this move to challenge her, keep her motivated or just boost morale after a tough set.
Hopefully, Jane can perform this anchoring exercise with proper form and range of motion. If not, don’t make a big deal of it; offer a variation that allows her to be successful. She likes this exercise, so don’t ruin it for her—especially on day one!
As you select the rest of the session exercises, consider the compensations you identified during assessments, and pick the most notable issues to work on (just one or two). You cannot fix all of them today, so don’t try to. Attend to those that need the most attention and you will be building a strong foundation for future sessions.
Set the Stage With Movement Preparation
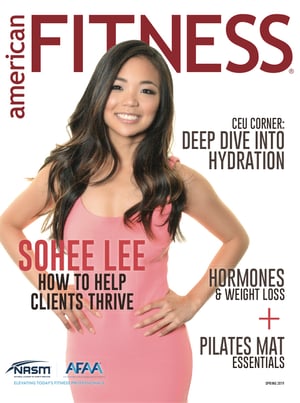
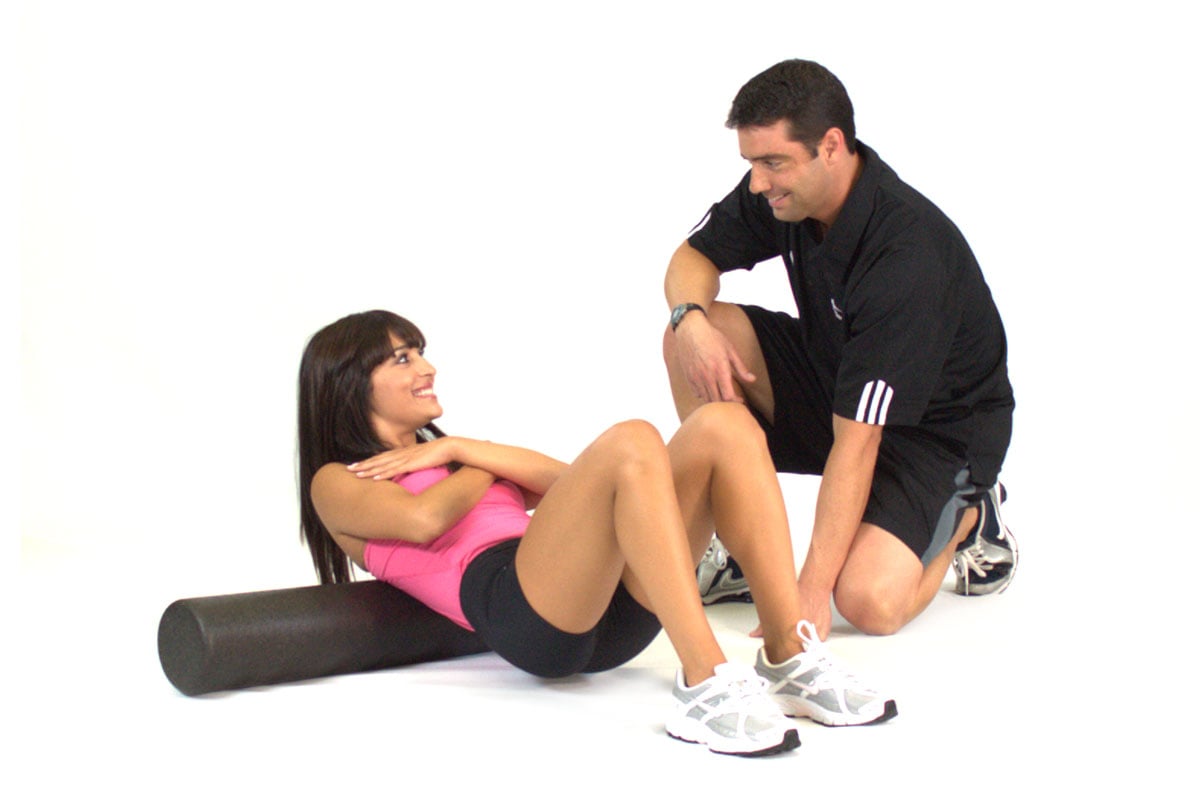
Movement preparation is a fitness industry phrase that has become synonymous with “warmup.” If assessments revealed musculoskeletal imbalances, NASM recommends first performing self-myofascial release (such as foam rolling) on tight or overactive muscles. You can follow this with various forms of stretching, mobility and activation drills, as well as core, balance and plyometric exercises. You can even include a short bout of cardio in the warm up any time after the initial SMR.
Keep in mind that, for new clients, the warmup may be about a third of the session. This depends on their current fitness level and what you saw in the assessments. A 20-minute warmup in an hour long session can seem like a lot of time, so keep it interesting and challenging. It should still feel like a workout. The point, however, is to prepare the body and mind for the higher demands of the workout to come. Monitor intensity to avoid early fatigue.
Read also: Dynamic Warmups for Athletes
Review the Acute Variables
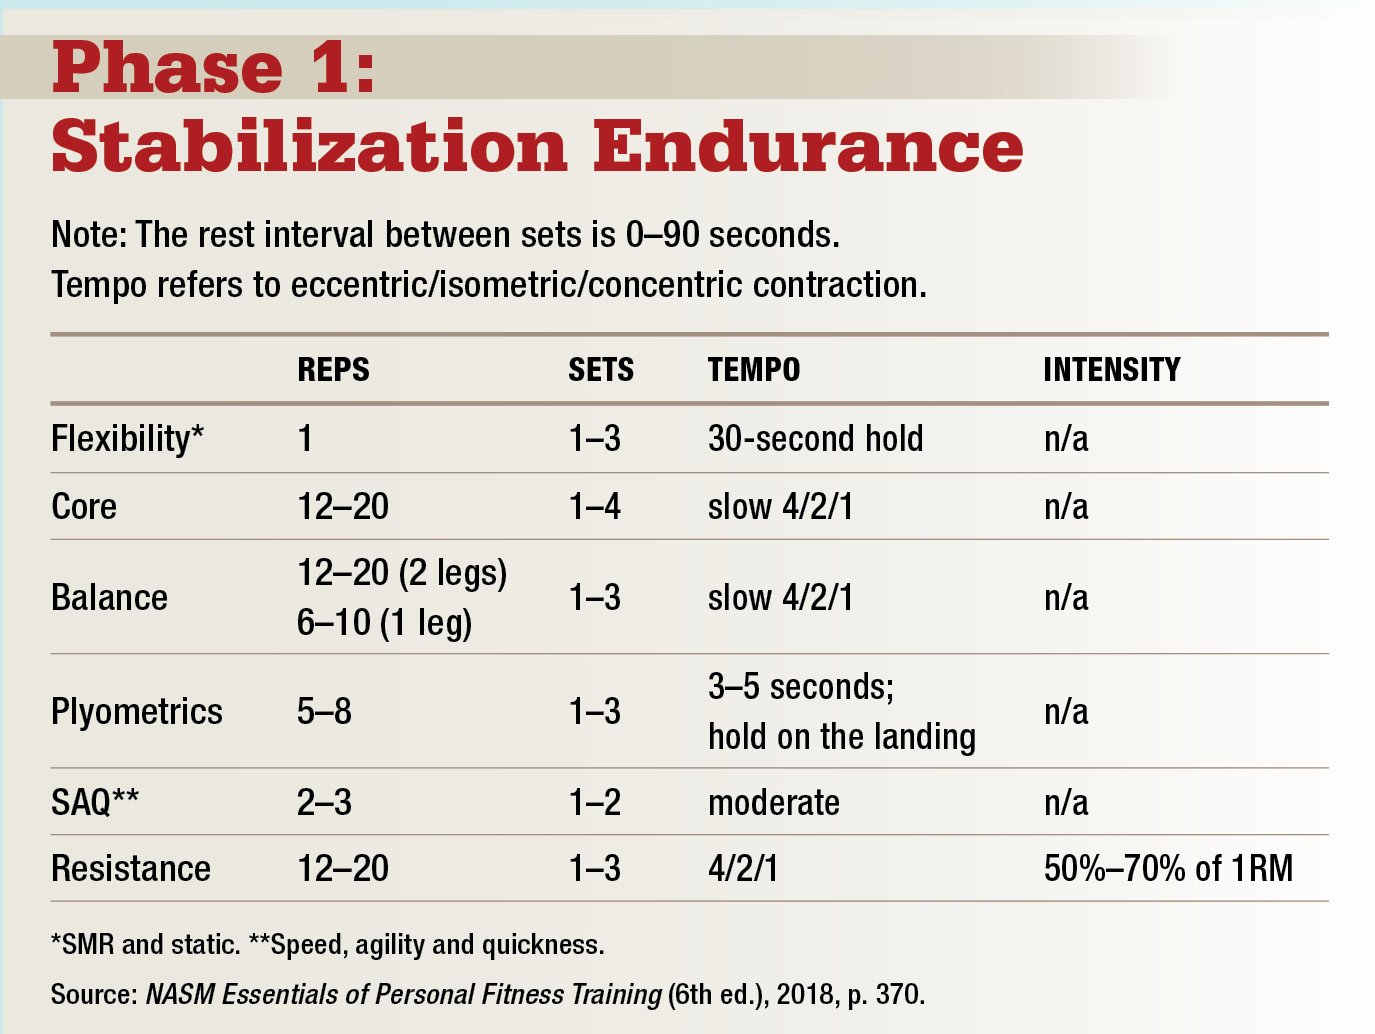
The NASM OPT model lays out variables for each phase and goal. Acute variable ranges for Phase 1: Stabilization Endurance are listed in the chart below. The following tips offer additional insights for programming resistance training for new clients:

SETS
Start slowly. One set per body section may be enough of a challenge for the first few sessions—some clients may get sore legs after doing 15 body-weight squats. Also keep in mind that the slow tempo used in this phase can increase delayed-onset muscle soreness because of the focus on eccentric action (deceleration). Consider this possibility, as well as the client’s comfort and performance in the first set, when deciding whether to do a second or third set.
REPS
Twelve to 20 reps may sound like a high number, but for endurance and stability goals this is an excellent range. Phase 1 targets type I muscle fibers, which are physiologically designed for endurance and stability. As new clients approach the final repetitions, there will likely be enough time under tension for them to start reaching volitional or momentary muscular fatigue.
LOAD
The goal is to have clients reach the point of fatigue by the end of the set, so if Jane stops at 20 reps but could have completed 30, the weight was too light. If she cannot get to 12 reps without fatigue, the weight was too heavy. We want new clients to feel successful, so it’s better to err on the side of too light.
TEMPO
Here’s another reason to start light: A tempo range of 4/2/1, or even 3/2/1, is surprisingly slow and can be deceptively difficult. The lighter weight will be easier to lift and control, and the slower tempo will make it easier for you to cue and focus on technique.
INTENSITY
The range of intensity in this phase is 50%–70% of 1RM. Fortunately, calculating intensity is essentially built into the NASM OPT model’s programming because the upper 1RM number corresponds with the lower rep number.
For example, if a client fatigues on the 12th repetition, you can assume that’s approximately 70% of 1RM. So, if the client can do 12 squats with 100 pounds (70% of 1RM), the 1RM will be about 143 pounds (because 100 pounds ÷ 70% = ~143 pounds). If the client doesn’t fatigue until the 20th repetition of 100-pound squats, that’s likely around 50% of 1RM, so the 1RM would be about 200 pounds.
Visit the NASM one-rep-max calculator to make sure you get it right!
Evaluate the Equipment Options
Body weight, machines or free weights? The answer is probably yes to all three. All are great when used appropriately for clients, based on their goals, needs, abilities and safety. Keep in mind that many people are uncomfortable when first entering a gym environment, so selecting equipment that is familiar (or at least not intimidating) is key.
Avoid automatically introducing clients to the same exercises and equipment that you use in your own training; learn more about each client and deliver what he or she needs.
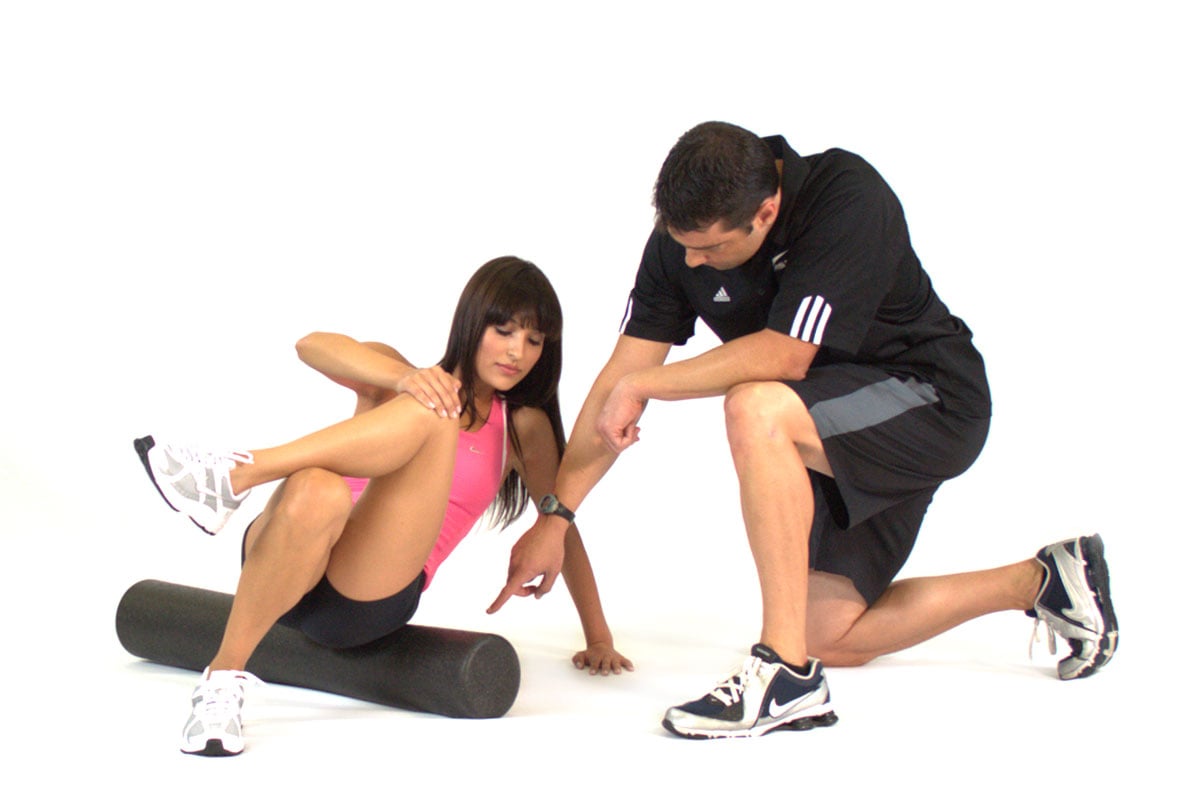
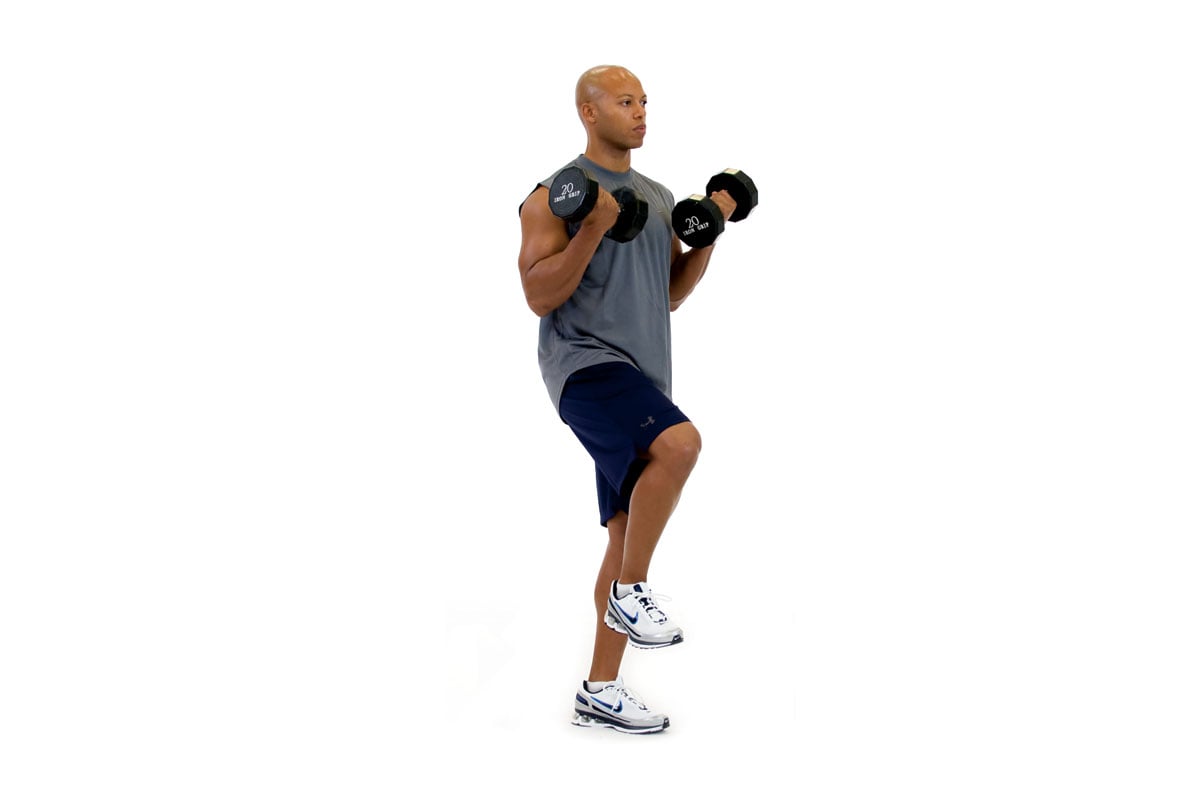
STRENGTH TRAINING MACHINES provide stability while developing fundamental endurance and strength. For clients who lack stability or have functional limitations, a fixed-motion machine may be the safest place to start. Many trainers balk at using machines because of the fixed plane of motion. Personally, I don’t care to use them, but that doesn’t mean my (or your) clients won’t like them or benefit from them. These machines can increase a client’s level of comfort and confidence, which should never be underestimated or devalued.
BODY-WEIGHT EXERCISES, such as pushups, situps and squats, will probably be familiar to new clients. These moves can improve a client’s kinesthetic awareness and provide a foundation for progressing.
FREE WEIGHTS can offer an effective stabilization challenge, depending on the client’s readiness and technique. Note that free weights may also initially be difficult or intimidating for some clients to use. You can always introduce these items later.
Be Flexible With Your Programming
Maybe you spend a lot of time developing Jane’s program. Yet, when it’s time for her session, you find that it doesn’t or cannot go to plan. For instance, the equipment you expected to use is occupied, out of order, missing, drenched in sweat or otherwise unusable.
A real-life example: A trainer at my NYC facility pulled out the battle rope for client drills during peak hours. When he noticed my eyes drilling holes in his soul, he asked if it was too busy (yes!). He looked stunned and did not know what to do next because he had no Plan B. As the saying goes: Don’t be that guy.
As a trainer, you need to have situational awareness to keep everyone safe. Situational awareness is the perception of your environment and activity with respect to space and time, an understanding of why it’s important, and an ability to decide how best to react to given circumstances.
Have a clear understanding of your client’s needs, your own needs, and the positions and actions of those around you. Consider environment, space, exercises and timing. Be acutely aware of other people using equipment that you planned to use, so that you can adjust course if necessary.
Fortunately, when you use the NASM OPT model, changing exercises or equipment on the fly can be relatively simple, since there are numerous options.
It Ain’t Over, Even When It’s Over
When the first session is over, it ain’t over! Schedule a follow-up message (text, email or phone call) to check in with your client the next day. It’s a simple and effortless task, but it can mean so much. People like knowing you care and are willing to attend to them beyond the time slot they paid for.
This speaks directly to the value you bring to their training experience because you are doing more than trading dollars for minutes. In fact, it’s one of the best ways to minimize client attrition, so don’t limit it to new clients!
Be sure to ask for feedback about intensity, fatigue, soreness, likes/dislikes, etc. This can help you determine whether to scale back or uptick the exercise variables or switch up moves or equipment choices in the next session.
Get Ready for Session Number Two!
Your first session may go great, or it may not. Working with a new client is a learning process for both trainer and client, and your working relationship will continue to develop over time.
The NASM OPT model is the science behind the programming, but there is also an art to applying the “personal” portion to personal training. Remember that new clients signed on because they felt comfortable with you, so let your personality show, and keep being you! You have the tools and skills to give all of your clients a great personal training experience and your undivided attention. So go get ’em!
How Hard Should I Push New Clients?
This is an interesting question and worthy of attention. How far clients are willing to be pushed is on a spectrum, as is how hard they perceive they’re being pushed. Even people with exactly the same strength levels can perceive intensity differently.
Using the rating of perceived exertion scale is ideal for receiving feedback from clients in real time. Ask them how they feel, on a scale of 1–10 (see chart), with 1 being “sitting on the couch watching Netflix” and 10 being “struggling through an unbearably difficult exercise.”
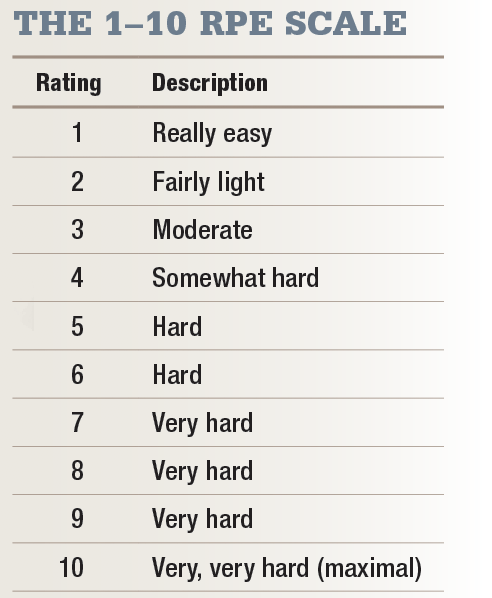
If clients give you a number somewhere in the middle, request that they increase intensity. If they are at an 8 or higher, make sure they are absolutely okay with that level, and adjust appropriately. Always start slowly, especially with new clients. You want to be very aware of their current level of fitness and ease them into elevated training intensities.
Soreness should not be a goal, and pushing too hard too soon can lead to client attrition (falloff or loss). Make sure new clients don’t push too hard simply to please you.
Cues: Choose Your Words Wisely
When my children were developing their walking and running skills, I was not waiting in the wings to critique their mechanics or cue a glute squeeze. Like kids learning a new skill, beginner clients need room to learn, develop and practice.
We should strive for structural and neuromuscular efficiency, not perfection, and if clients get stronger and faster in the process, that’s icing on the cake. Here are a few more things to keep in mind about your cues:
FOCUS ON PROGRESS, NOT PERFECTION
Your more seasoned clients may not be fond of “attaboy” feedback, but research in motor learning shows that beginner clients do better with encouragement and support. So be sure to give positive commentary, take notice of how clients respond and adjust your level of cheering accordingly.
BE CLEAR AND DIRECT
Take the time to provide clear, direct instructions on which muscles are working and should be felt during a movement. The Tell-Show-Do approach is an excellent start. Tell clients what they are going to be doing and why. Show them the exercise you want them to perform. Then have them do the exercise. It seems simple because it is simple. This is probably why it is overlooked.
BE HANDS-OFF WHEN POSSIBLE
Cuing during exercise is often discussed in auditory, visual and kinesthetic terms. Auditory and visual feedback should always be your first line of correction and cuing. Saying “Your head is jutting forward, so retract the head” is always better than pulling a ponytail back to align the head!
ASK BEFORE TACTILE CUEING
Touching can lead to uncomfortable situations; it may also be perceived as inappropriate by either a client or an observer—with potentially serious consequences. The best option is, therefore, not to touch. However, if tactile cueing is indicated, always ask permission first, explain what you want to do and tell clients how it will help. Ask them to please let you know if anything makes them uncomfortable, as that is not your intention.
Be sure to check out the OPT model page for more information.